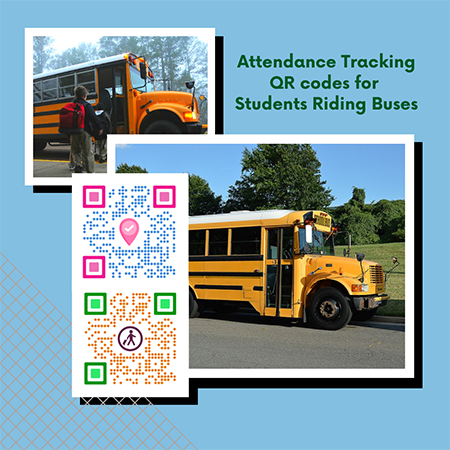
Ensuring our children’s safety is one of the top priorities of any parent or guardian. Especially today, when crimes can occur almost anywhere or anytime.
For parents who have kids riding the school bus, it’s common for them to check if their children boarded the school bus after classes are dismissed. School administrators or teachers often receive calls from worried parents asking if their children have gotten on the bus. This becomes an issue for teachers if they have no way of monitoring the students riding the school bus.
To help with this dilemma, a school administrator or teacher can create an attendance tracking QR code for student to record when they get on and off the school bus. The attendance tracking QR code for check-in can be scanned by the driver or a parent volunteer when a student boards the school bus.
When the student gets off the bus, another QR code for attendance tracking check out can then be scanned. Both the attendance tracking QR codes for check-in and check-out record the location that the QR codes are scanned. Doing this records the whereabouts of the students upon check-in and check-out. This is beneficial for parents when making sure that their child arrives home.
The attendance tracking spreadsheet can be accessed by anyone with the link. When a parent checks on their child, they just need to check the attendance tracking spreadsheet to see the information they’re looking for.
In this blog post, I will show you how to create the two attendance tracking QR codes, one for student’s check-in and another for student’s check-out.
Create Your Attendance Tracking QR Codes
In this guide, I will first show you how to create the attendance tracking QR code for check-in.
How to Create a School Bus Check-in Tracker QR Code
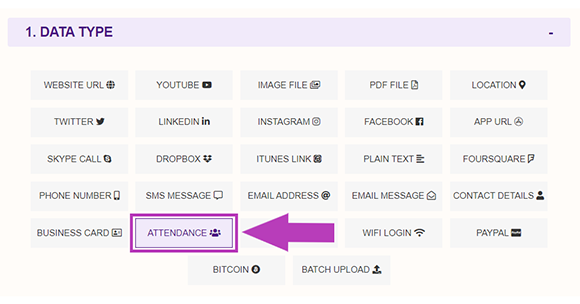
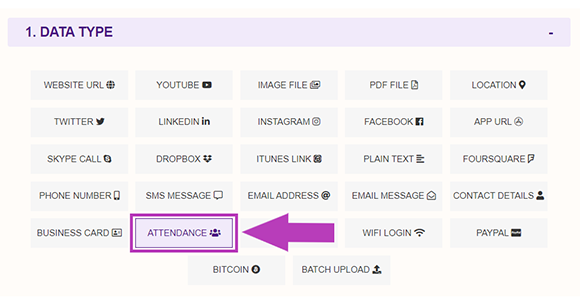
- Go to https://www.qrstuff.com/type/attendance and have the “Attendance Tracking” data type pre-selected from the first section.

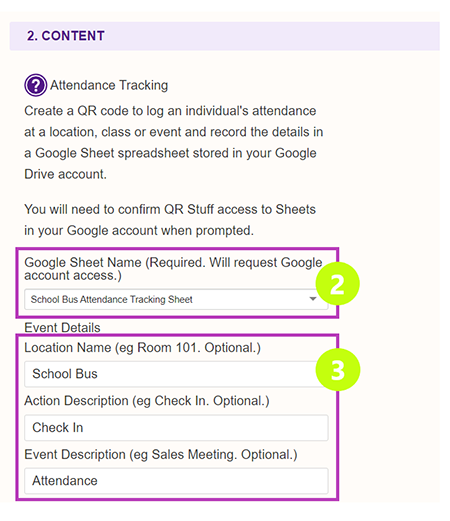
- Under the second section, click the “Google Sheet Name” field. When a pop-up dialog box appears, log into your Google account. After you’re logged in, this allows QRStuff to create a new tracking spreadsheet in your Google Drive and update it for every scan to the created QR code. (Keep in mind that this access authority is only for the said tracking spreadsheet and doesn’t give any other user privileges for your Google account.) Type in a relevant name for your spreadsheet in the “Google Sheet Name” field.

- Enter the needed details for the next three fields provided under Event Details: Location Name, Action Description and Event Description. Because we need to create an attendance tracking sheet for students’ check-ins first, we can enter “School Bus” as the location, “Check-in” as the action, and “Attendance” as the Event Description.
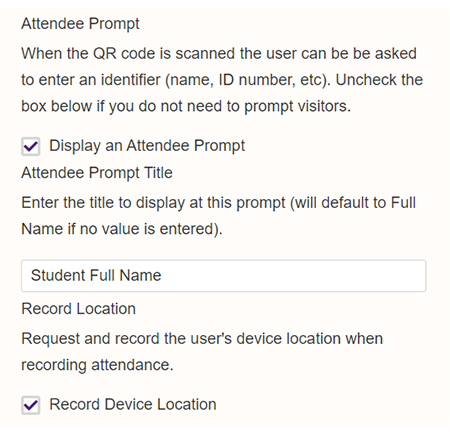
- Under the Attendee Prompt section, check the box “Display an Attendee prompt.” Because we need to ask for the student’s full name upon their check-in, let us indicate “Student Full Name” on the blank field provided under the “Attendee Prompt Title.”

- Next, check the box beside the “Record Device Location” prompt under the “Record Location” section. If you check the box, it requires the users scanning the QR code to provide their location. If they do not agree to provide a location the attendance is not recorded in the Google Spreadsheet.
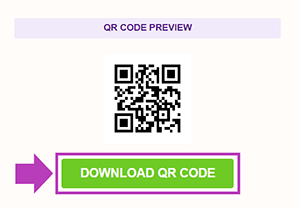
- At this point, you can download the generated QR code by clicking the “Download QR Code” button.

How to Create a School Bus Check-out Tracker QR Code
Now that we’re done with creating the school bus check-in tracker QR code, next we need to create the school bus check-out tracker QR code.
- Go to https://www.qrstuff.com/type/attendance and have the “Attendance Tracking” data type pre-selected from the first section.

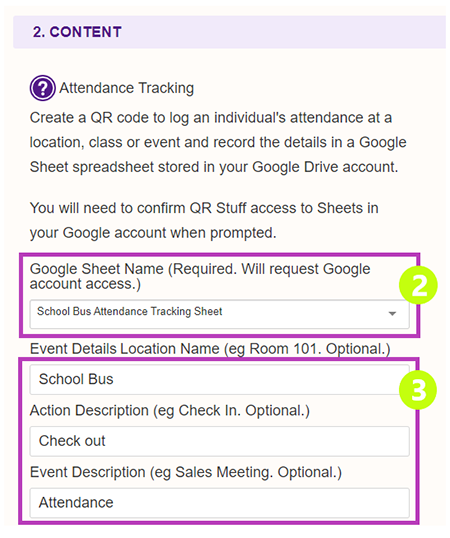
- On the drop-down list that you find on the second column, select the same Google sheet name that you used for the school bus check-in tracker QR code. There is no need to create a new Google sheet.

- On the three fields under the “Event Details” section, use the same for the “Location Name” and “Event Description” fields. For the “Action Description” field, change it to “Check-out” this time. Doing so differentiates the check-ins from check-outs which makes it easier to check on the School Bus Attendance Tracking Sheet.
- Under the “Attendee Prompt,” “Attendee Prompt Title” and “Record Location” sections, select the same options used when creating the school bus check-in tracker QR code. Check the box beside the “Display an Attendee Prompt” and indicate “Student Full Name” on the “Attendee Prompt Title” field. Lastly, check the option “Record Device Location.”

- At this point, you can click the “Download QR Code” button.
How the QR Codes Work
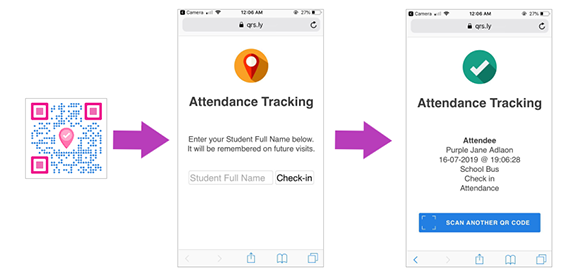
When the student gets on the bus, the student or driver scans the school bus check-in tracker QR code. Upon scanning, the student is asked to enter his/her “Student Full Name.” After clicking the “Check-in” button, the provided location name, action, and event description appears. The attendance check-in details are also recorded in the corresponding Google spreadsheet.
Before getting off the bus, the student should be asked to scan the school bus check-out tracker QR code. When the code is scanned, the student needs to provide his/her “Student Full Name” again. Clicking on the “Check-in” button, the same details appear. The attendance check-out details are then recorded to the same Google spreadsheet where the check-in details were recorded earlier.
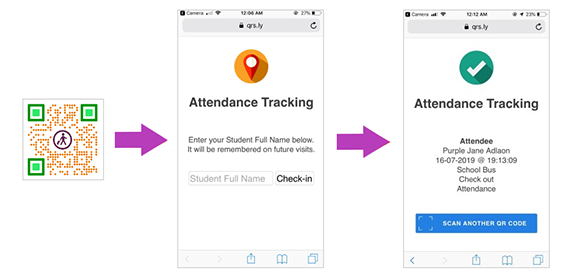
Note: The date and time recorded is based on the time zone that you have indicated in your subscriber account setup.
About Your Google Sheet
The spreadsheet where all the check-in and check-out details are recorded can be accessed through the Google account that you provided in the second step outlined above. You can access the said spreadsheet through logging in your account at https://docs.google.com. You can see the created spreadsheet for both the School Bus check-in and check-out tracker QR codes from the list of available sheets in your Google Drive.
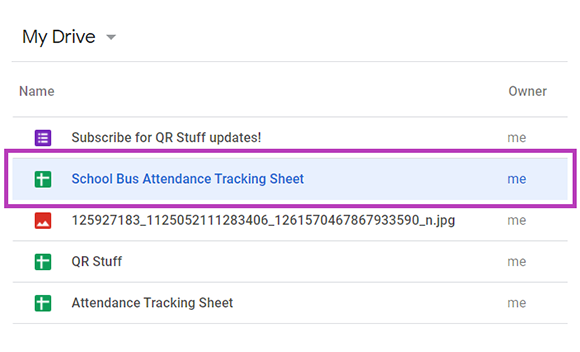
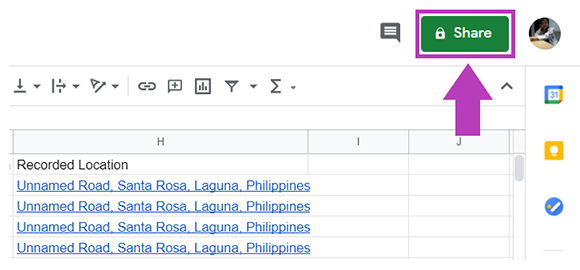
Here is a preview of what you might see in the attendance tracking sheet for the school bus check-in and check-out QR codes. If a concerned parent wants to have a look at the spreadsheet, you can click the “Share” button in the top right corner.

Make It A Bit Fancy
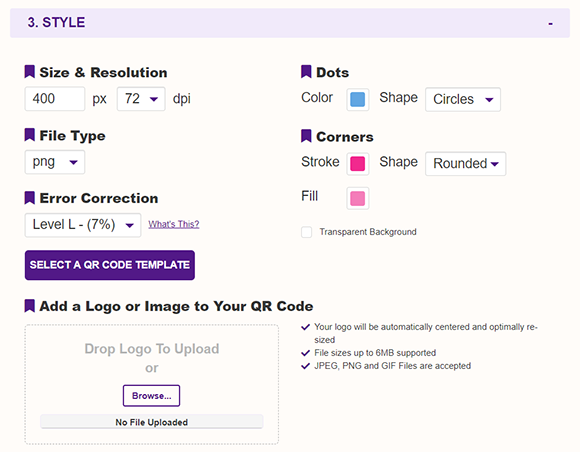
Paid subscribers have the privilege to choose the colors of the dots and corners of their created QR code. They also have the option to insert a logo or a relevant image in the center of their QR code. Following the same steps outlined above, they only need to click the “Style Your Code” button before proceeding to download their QR code.
The QR code above is an example of a styled QR code that paid subscribers can come up with using our QR Code Styling feature. Through the interface, you can turn your QR code into a visually distinctive and intuitive one by inserting a relevant logo or image to the center.
See It In Action
Subscribers Get More QR Stuff!
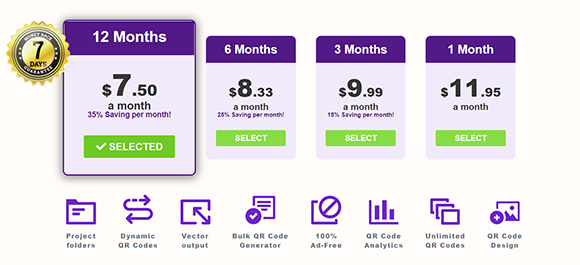
Become a QR Stuff paid subscriber and get unlimited QR codes, unlimited scans, analytics reporting, editable dynamic QR codes, high resolution and vector QR code images, batch processing, password-protected QR codes, QR code styling, QR code pausing and scheduling and more, for one low subscription fee.
Full subscriptions start from just $11.95 for a 1-month subscription (lower monthly rates for longer periods). Subscribe now.





Declan Ahern
CEO
Declan Ahern is the CEO of QRStuff.com, a trusted platform for QR code creation and digital tools. Under his leadership, the company has continued to grow steadily, focusing on simplicity, reliability, and user-centered design. Declan shares insights on QR technology and innovation, helping users get the most out of their digital experiences.